You are browsing the archive for crafts for disabled children.

Snowman Fun Almost Done?

February 24, 2014 in Creative Adventures

Just wanted to shoot out a quick post for these final snowy days of winter. I have a nice post about germs with some really fun activities but I did not want to miss my snowy opportunity. So many times we are creating cool and fun projects for winter and by the time you get to posting it, the season is gone. Well, these past few days have been a bit warmer and great for creating snowmen, and I have heard there is more snow in the forecast this week. Below is a snowman or two for you to create. Enjoy that fluffy white stuff while you can…spring will be here before you know it. Yeah!

stained glass tissue snowman w words

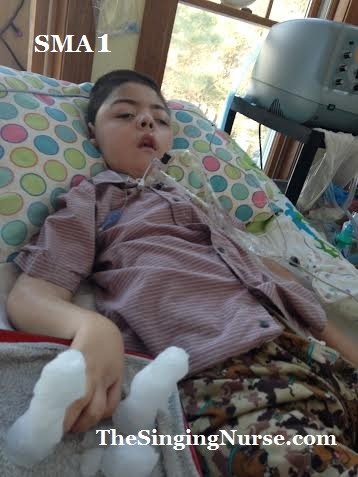
My patient and I made this snowman using hand over hand. You can learn more about Kian here.

You will need: small and large white paper plates, scissors/exacto knife, glue, tissue paper, markers, two sticks/twigs, twizzlers, and fancy tape.

Pretty easy to make: cut circles out of each size plate, use one of the inside circles for the head and the other for a hat. Put glue around the eating side of the edges of the plates and have the kids place strips of tissue paper across the holes. Let it dry, trim the edges, tape the 2 plates together.  Draw a face, cut a small slit to place your twizzler and tape to the other 2 plates, make and add a hat and fancy tape for scarf, add stick/twig arms and little hands. Place the twizzler in his mouth. Hang it in the window to catch the sunlight.

Here is a cute game to play when you are stuck inside during bad weather or you’d like to give the kids something to do while you cook dinner. My daughter in-law is a great mother, very creative and also happens to be a Special Ed Teacher. She created this simple game.

draw snowman instruction codes cropped w words    draw 1 snowman cropped w words

1 snowman complete w words         snowman Game

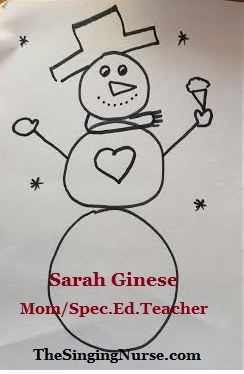
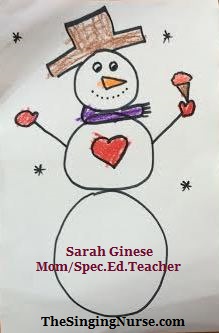
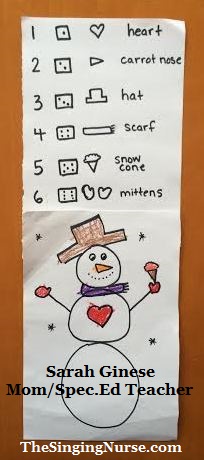
Here are her instructions to play. “Take turns rolling the dice and color the part that corresponds to the number. First one to color all the parts wins. I did it with a skeleton at Halloween and a Christmas tree. Easy”

Cute huh? I also thought you could make a large version, hide the pieces around the house or classroom and have the kids Velcro then on as they find the pieces.

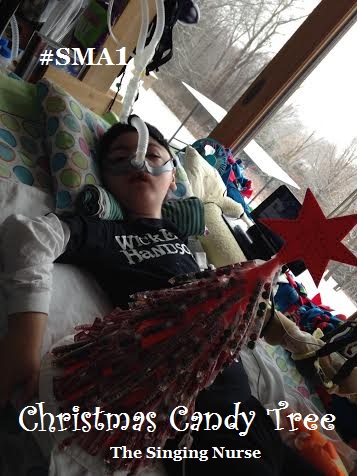
More hand over hand with my patient Kian. He does not get to romp in the snow like other kids so I brought some inside for him. We made some mini snowmen. He enjoyed feeling the cold squeaky granular white snow.

Kian w snow 2 w words 2

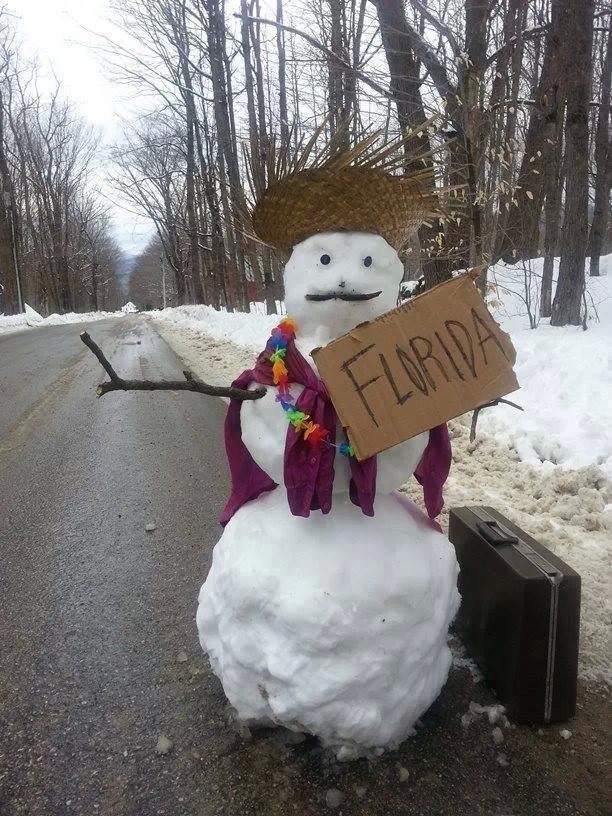
One last picture for you. You may have seen this flying around on Facebook. I thought he was cute and whoever created him was very imaginative. Photographer unknown. Speaks volumes to those who wished they were not in all this white stuff. Snowman wants to go to Florida

Have wonderful rest of the winter!

Proverbs says: “A merry heart does good like a medicine.”

 Stay Healthy,

Ms. Dawn

One more bonus: For those of you who have enjoyed The Singing Nurse Music and Lessons have also learned that my husband and I have recently finished up on a big kids(parents) project. It’s a CD with music that is kind of jazzy, kind of Lennon, kind of Rundgren that has lots of heart felt thoughts about life, relationships and God’s love. For more info, to listen to an interview I did with him about one of the songs and to watch a few song videos I created. Check it out Here! I think you will really like the music.

Candy Christmas Tree Creation

December 17, 2013 in Chronic Illness - Disabilities, Creative Adventures

Kian w tree w words

 Most of us like a little candy during the Christmas season. Kian and I wanted to show appreciation to all his nurses and therapists so we created a simple Christmas Candy Tree. We made it with poster board, stickers, candy, a bow, a star and a Christmas pin. It took about an hour to create this Christmas Candy Tree Craft. Have some fun, spread a little cheer, make and bring one to a Christmas Party or use it as a center piece for one of your holiday gatherings.

decorate with sticker tape to paper plate

Create a cone(use 1/2 sheet size poster board)and tape it to a white paper plate. Use hand over hand with disabled children to place stickers on the cone. Attach a Star with a Christmas message. Details for creating a cone.

Place tape on the ends of the candy and help your kids tape it to the tree. Use hand over hand with handicapped or disabled children. All children like to see the results of touching and building a creation.

hand over hand with Kian w words

Wrap a box and place your creation on top. We also added a simple bow and a Christmas bear pin.

add a star, bow and pin witih words

Find out more about Kian and SMA1. SMA1 is the leading cause of death in children under 2 years of age. You can be tested to see if you are a carrier. Kian is now 7 years old and doing well. He has 24 hr nursing care, has short teaching sessions with a special education teacher 5 days a week, has PT, OT, ST, a regular dietitian visit and now enjoys chiropractic sessions. Kian lives a very busy life. He has many limitations but feels like all other children.

Another Christmas Crafts you may like:

Christmas Poster Tree Card

Subscribe via feedburner to receive all our post about being crafty, healthy, musical and educational. A great resource to help make life happy and healthy for you and your kids.

Subscribe at the top right corner to receive all our posts and a free Hand Washing Activity eBook.

Have a wonderful Christmas, 

Dawn

How are you staying, healthy, happy, creative and educated? Comment below.

Making Greeting Cards

June 15, 2011 in Chronic Illness - Disabilities, Creative Adventures, Nurturing the Child, Uncategorized

Items you will need: pipe cleaners, paint, construction paper, scissors, glue, thick white paper, a picture of your child.

1. Bend the pipe cleaners to make different shapes, create a handle to hold on to.

2. Dip different shapes in to different colors and press on to the construction paper.

3. Do hand over hand for children who do not have use of their hands, they will enjoy the craft as well.

4. We trimmed our creation and glued thicker white paper inside for writing on.

5. We also glued our picture on the outside of the card.

Have fun with it, all children will enjoy creating a card for someone special in their lives.